Pedal Sensor
the system
Here's how it works...
01
Start pedalling!
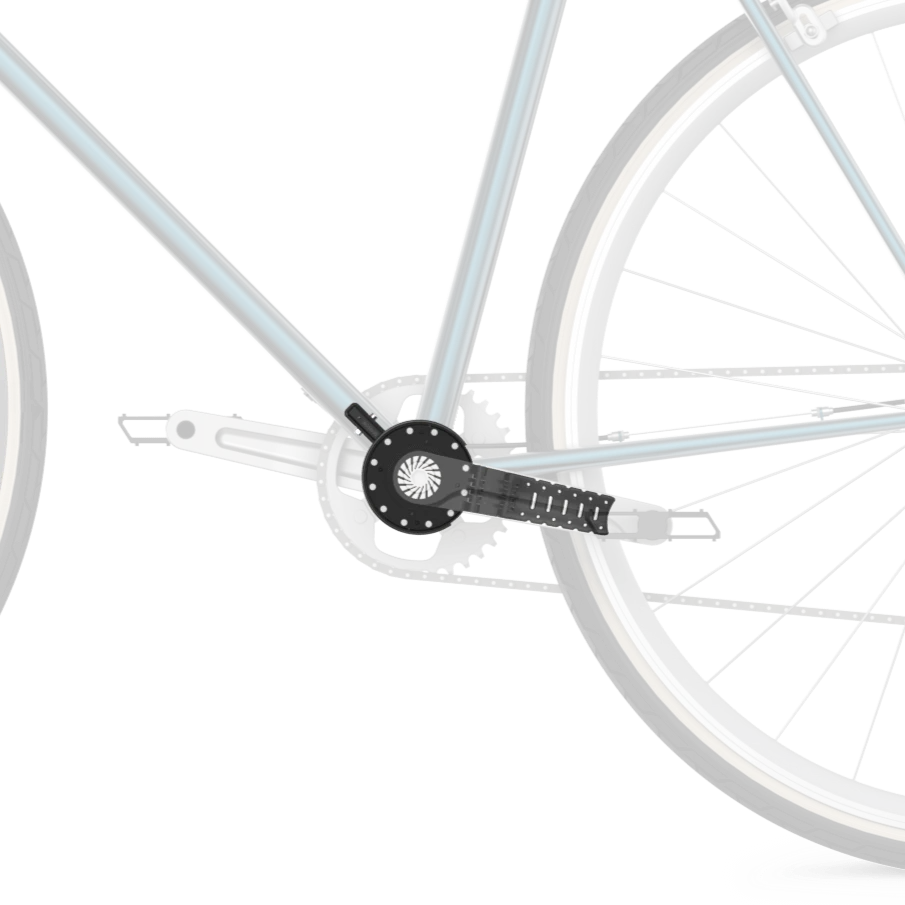
Once the Kit is successfully installed, turn it on and start pedalling as usual. You’ll notice the red LED on the pedal sensor flashing! This happens as the magnets on the magnetic disc pass by the sensor, signalling to the system that you're peddling.
02
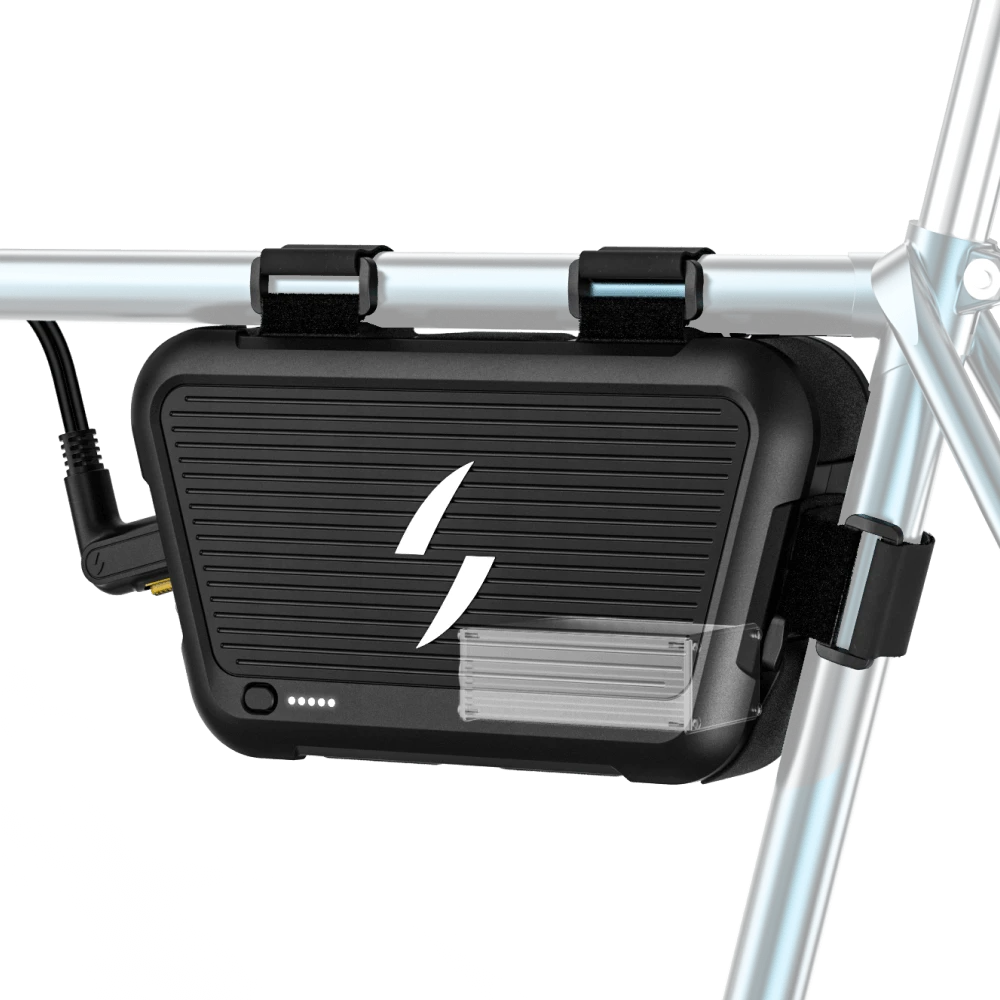
Info gets sent to the controller
The motor controller regulates the flow of electricity from the Power Pack to the motor wheel, controlling speed and torque based on rider input from sensors like the throttle or pedal-assist. It ensures smooth operation, monitors system performance, and protects the motor from electrical overloads. The GO controller is integrated directly into the Power Pack and within the mount for the AIR Kits.
03
Motor wheel gets supplied with power
The motor wheel houses the motor that converts electrical energy from the Power Pack into mechanical energy to propel the bike forward with 250W of power!
01
Start pedalling!
Once the Kit is successfully installed, turn it on and start pedalling as usual. You’ll notice the red LED on the pedal sensor flashing! This happens as the magnets on the magnetic disc pass by the sensor, signalling to the system that you're peddling.
02
Info gets sent to the controller
The motor controller regulates the flow of electricity from the Power Pack to the motor wheel, controlling speed and torque based on rider input from sensors like the throttle or pedal-assist. It ensures smooth operation, monitors system performance, and protects the motor from electrical overloads. The GO controller is integrated directly into the Power Pack and within the mount for the AIR Kits.

03
Motor wheel gets supplied with power
The motor wheel houses the motor that converts electrical energy from the Power Pack into mechanical energy to propel the bike forward with 250W of power!
Smart Detection
Senses as you pedal
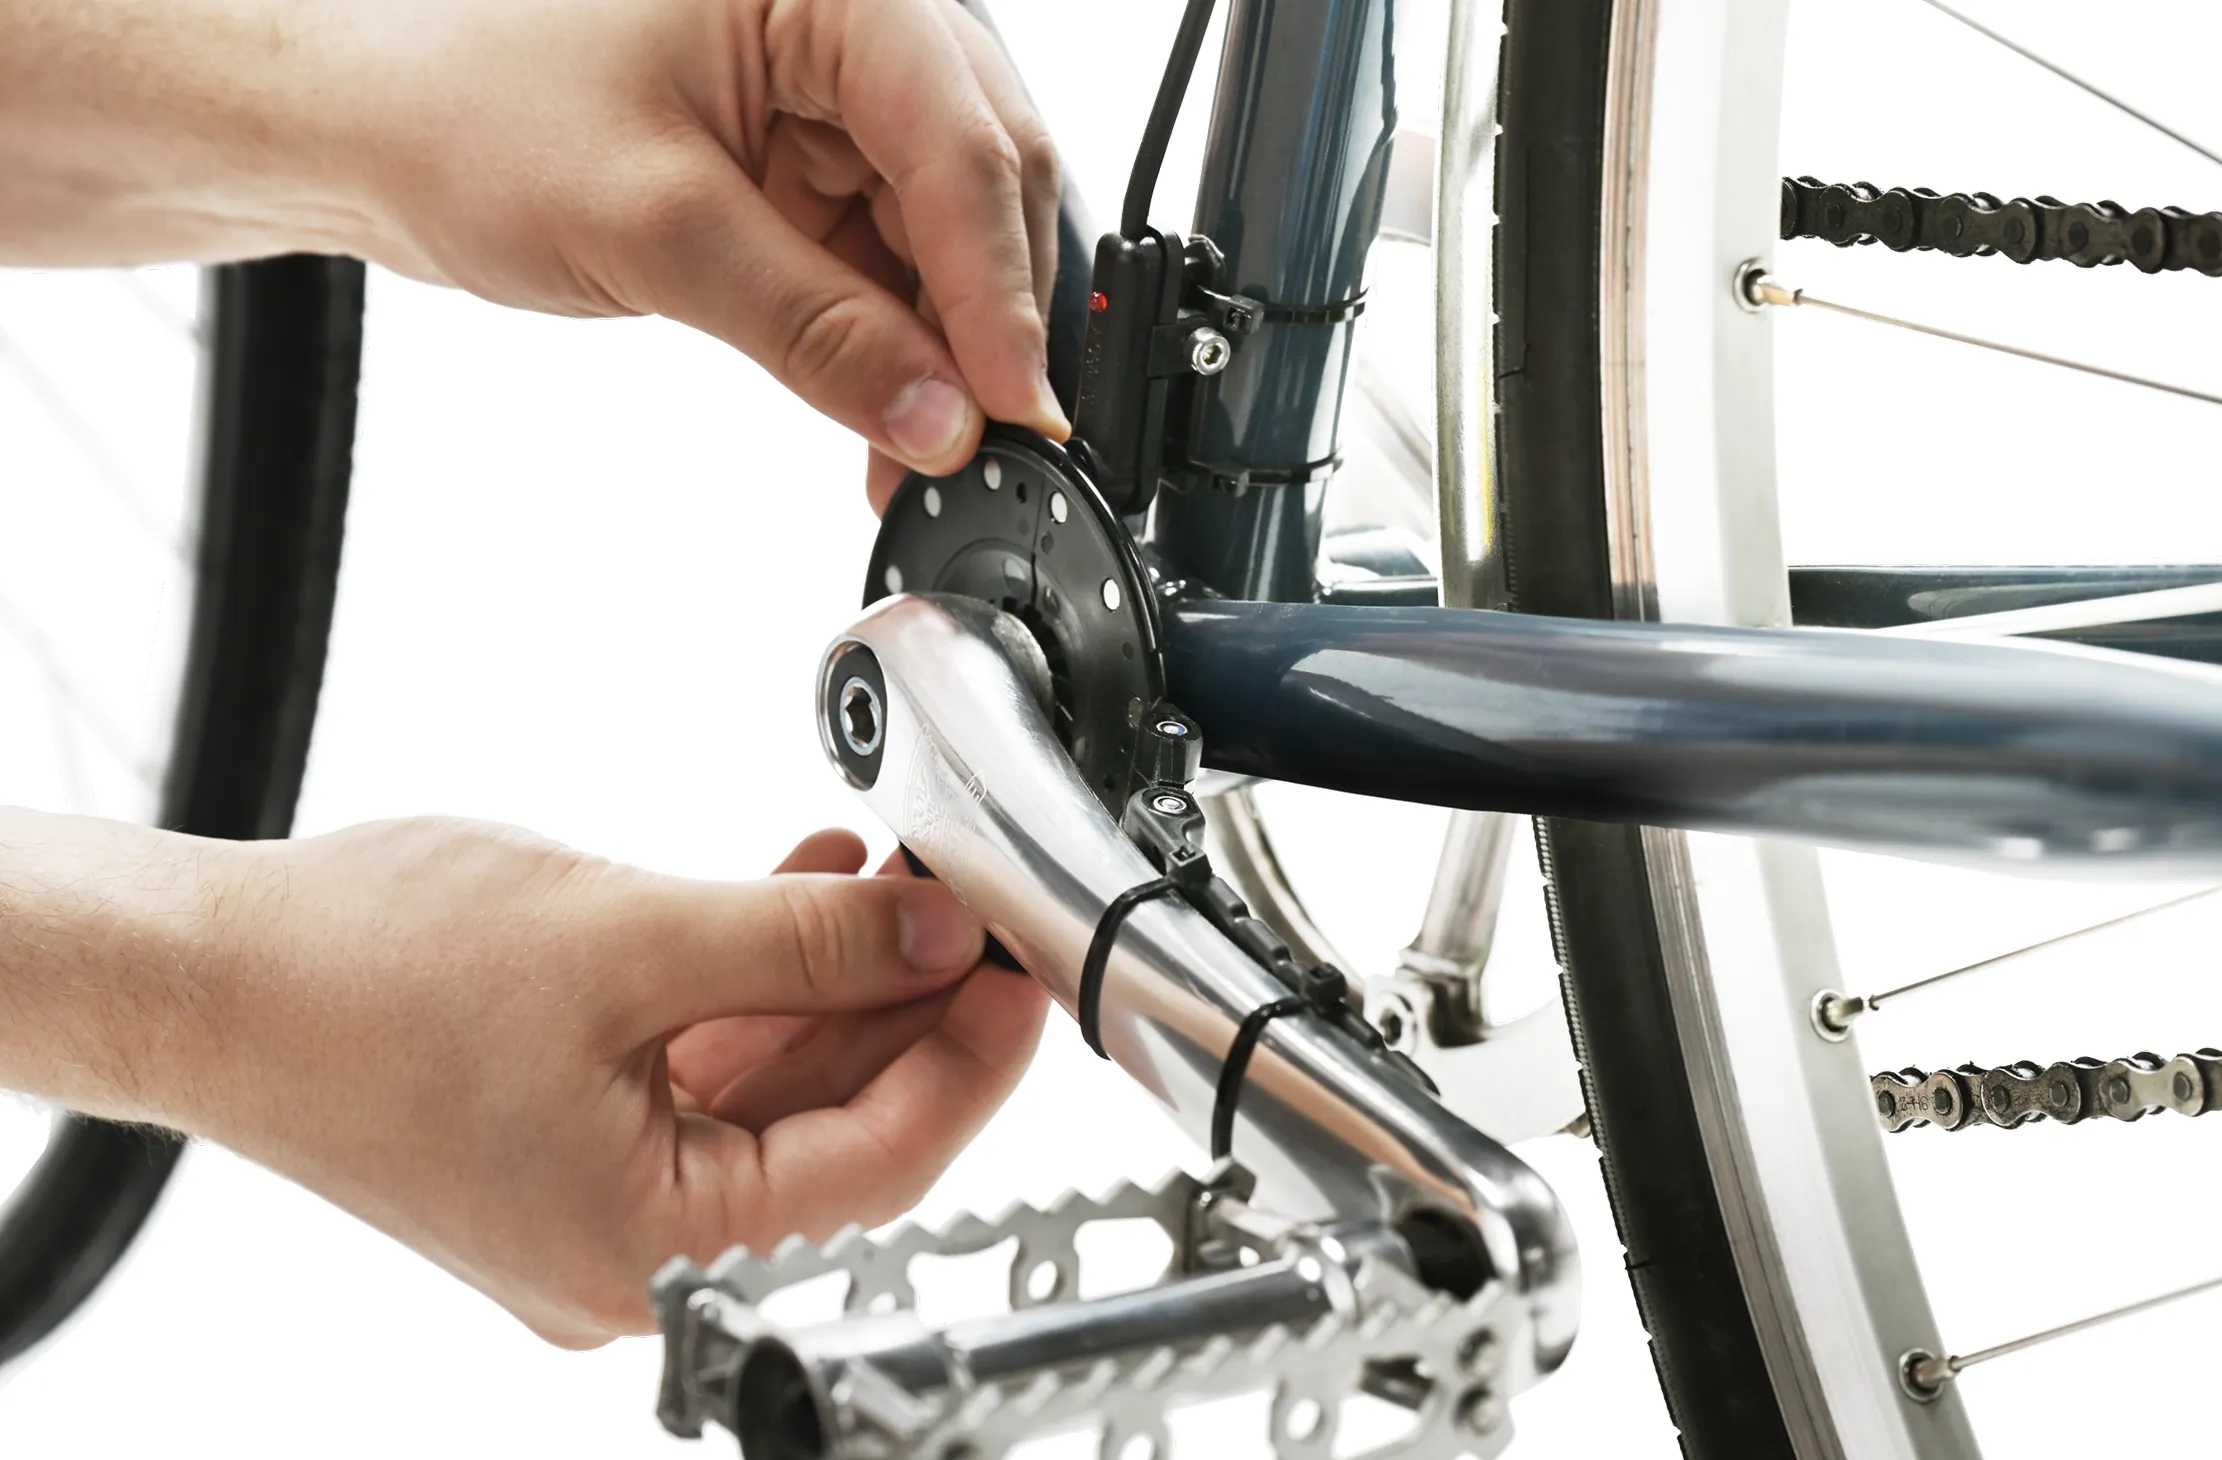
The Swytch Kit uses pedalling information to stay compliant with regulations. The pedal sensor, one of the three core components to the kit, accurately detects when you pedal and when power is given. Watch the video to hear from our CTO, Dmitro, as he explains how it works and demonstrates the installation.
CLIP-ON
Fits down by the pedals
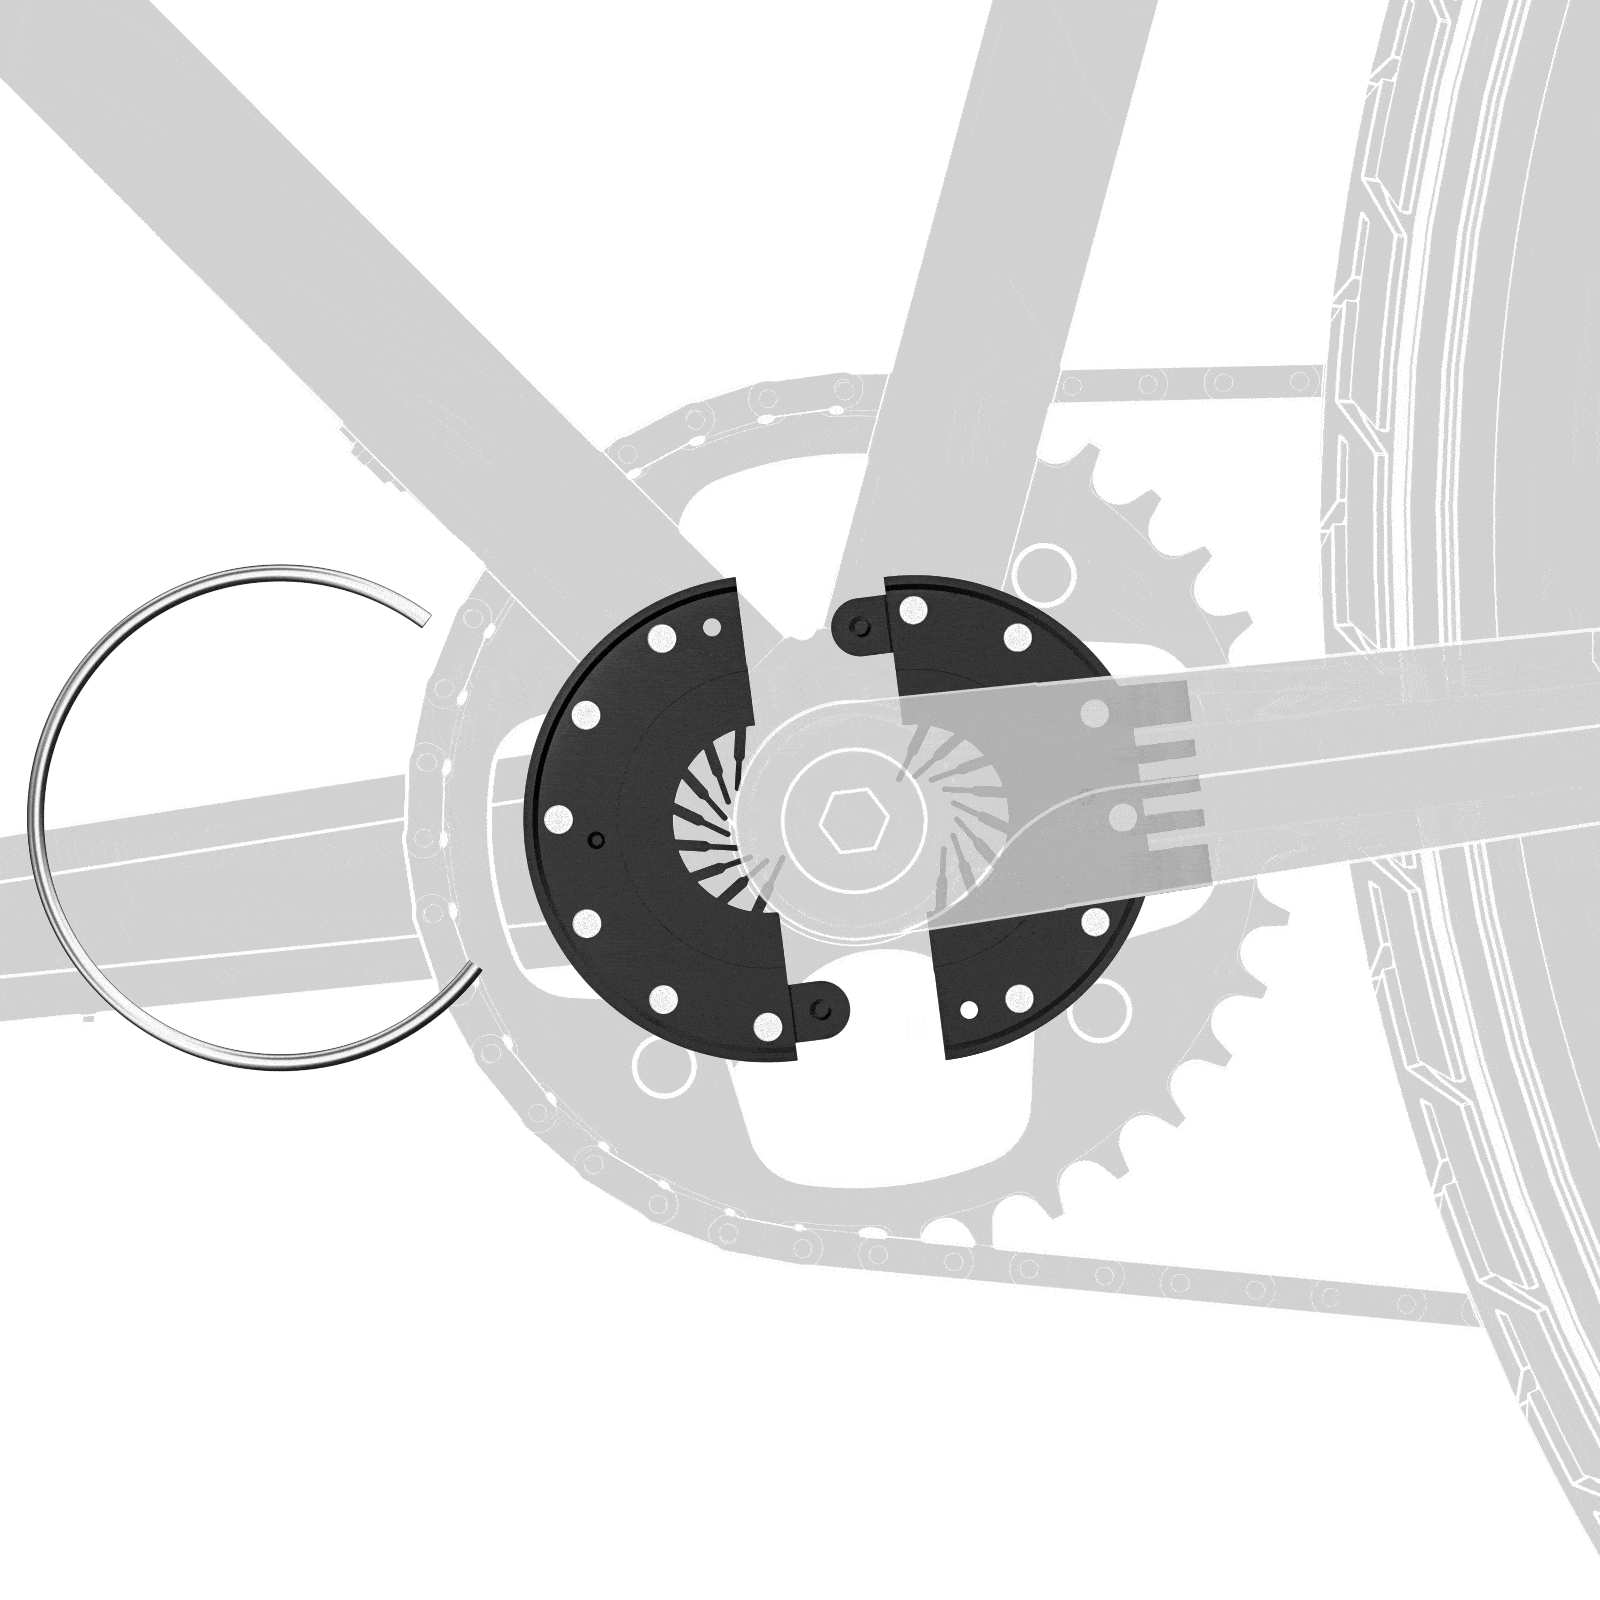
Designed by Swytch, our pedal sensors are built to easily clip together, making installation a breeze.

Connectivity
Works using magnets
To ensure the pedal sensor detects your pedalling, make sure the distance is 2mm or less.

Three Options
Comes in a few options
You will receive the pedal sensor for the size of wheel you select during your order, meaning you don’t have to worry about selecting the right size for your bike!
Frequently Asked Questions
Got a question?
Does the pedal sensor work in all weather conditions?
Yes, but if you’re cycling through muddy conditions, make sure to clean the disc and sensor regularly to ensure the magnetic signal is still being detected. Also, keep in mind that mud could shift the disc or sensor, so be sure to secure them tightly with cable ties.
What does working surface mean on the magnetic disc?
This side of the magnetic disc should face the sensor while you pedal. If it’s reversed, the sensor won’t function properly.
My pedal sensor is not working what is the issue?
The most common issue is that the distance between the disc and sensor is either too wide or misaligned. Please refer to the instruction manual for a detailed guide on how the pedal sensor should be fitted. If you have an unusual bike setup with a gap too small to fit the sensor, you can use pliers to remove the pivot plate, reducing the space – this will not void your warranty. Read more information here.
What tools do I need to fit the pedal sensor?
For the standard, universal, or Brompton pedal sensor, all you need is a pair of scissors to trim the cable ties. For the Brompton specific magnetic discs you will need a 2.5mm Allen key – the manual for this is here. For the integrated option, you’ll need a bottom bracket remover to take off the crank arm. This tool is available in our shop as part of our toolkit.
Do Brompton owners automatically receive a Brompton-specific pedal sensor, or do they need to choose between the standard, universal, or integrated options?
In the order portal Brompton customers will automatically receive the Brompton-specific pedal sensor (PAS-BRO) due to the wheel size that has been selected – along with the standard magnetic disc or universal magnetic disc. If they choose the integrated option, they will receive only the integrated sensor.

